
How to Use Google Flow (Step-by-Step Tutorial)
How to Use Google Flow: The Complete AI Video Production Workflow (2026)

Google Flow (flow.google) converts text prompts into finished cinematic video through a five-stage pipeline: concept prompting, storyboard refinement, clip generation, scene assembly, and character locking. A six-frame commercial costs roughly 90 credits, and the full workflow takes under 30 minutes once you stop making the credit-burning mistake most beginners repeat in the storyboard phase.
I’ve spent the last several weeks running real projects through Flow — product commercials, character-driven narratives, and style-transfer experiments on existing footage. What I found is that the tool’s actual power isn’t the video generation itself. It’s the storyboard engine that sits upstream of every clip. Get that right, and your outputs look like they came from a small production house. Rush it, and you’ll burn through your credit balance producing inconsistent, unusable shots.
Here’s the exact workflow, the real costs, and the honest limitations nobody in the current top search results is telling you.
What Google Flow Actually Does (And Where It Falls Short)
Let’s skip the hype. Google Flow is not a one-click “type a sentence, get a movie” tool. If that’s what you’re expecting, you’ll be disappointed within the first ten minutes.
What Flow actually does is enforce a storyboard-first production methodology that most AI video generators skip entirely. You describe a concept. Flow asks follow-up questions about vibe, hero features, and visual style. Then it generates a detailed text storyboard — complete with character descriptions, camera angles, lighting notes, and dialogue — before a single frame of video is rendered.
That’s the real product. The video generation is the output. The storyboard is the engine.
Where it falls short: Flow currently struggles with long-form content (anything over 60–90 seconds gets unwieldy), precise lip-sync on dialogue-heavy scenes, and complex multi-character interactions in a single frame. If you need a five-minute explainer with synchronized narration, you’re better off assembling Flow clips inside DaVinci Resolve or Premiere Pro.
Your First Project: Blank Canvas to Storyboard in Under 5 Minutes
Head to flow.google and sign in with your Google account. The homepage shows your recent projects, featured examples, and a “New Project” button. Click it.
You’ll land on the main workspace. Left sidebar: media, characters, scenes, AI tools. Center: your canvas. Right: the AI assistant. Bottom: a prompt box asking what you’d like to create.
Here’s the quick win most tutorials bury: your first storyboard costs zero credits. Text-based iteration is free. Video generation is what drains your balance. So take advantage of this.
Type your concept into the prompt box. I tested with a short commercial for a fictional bakery. Flow didn’t immediately generate video. Instead, it asked three follow-up questions:
- What’s the overall vibe? (I chose “cozy and warm”)
- What’s the hero feature? (Chocolate chip cookies, obviously)
- What visual style? (Photo-realistic, cinematic)
Answer those, and Flow generates a full text storyboard — characters, locations, props, wardrobe, and a frame-by-frame breakdown with camera angles, lighting, and dialogue for each shot.
The Storyboard Trap: Why Most Beginners Burn Credits on Bad Prompts
Here’s the thing most first-time users get wrong: they rush from storyboard to “Generate Video” the moment the first draft looks passable.
Don’t do this.
Every text edit you make in the storyboard phase is free. Every video generation costs roughly 15 credits per clip. In my bakery test, the six-frame commercial would cost 90 credits to generate. If I had skipped the refinement step and generated immediately, I would have missed a critical detail — the product box in frame six had no brand text on it.
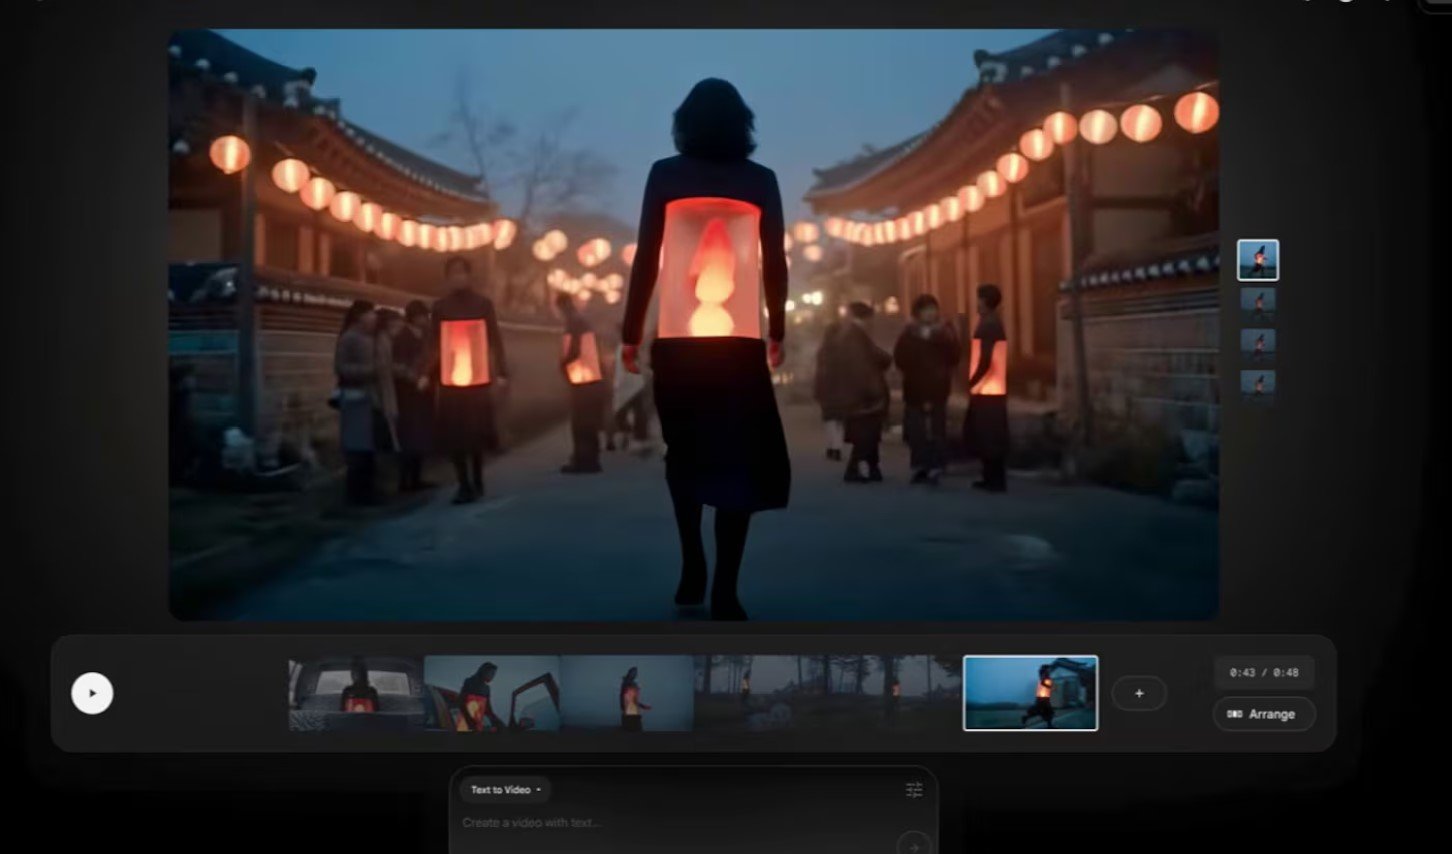
I caught it because I scrolled through the visual storyboard preview, noticed the blank box, typed a one-line correction in the prompt field, and regenerated the storyboard for free. That single iteration saved me from wasting 90 credits on a commercial I’d have had to redo anyway.
The rule is simple: spend 80% of your time in storyboard mode. Refine until every frame description reads like a shot list you’d hand to a real cinematographer. Then — and only then — approve the generation.
How Much Does Google Flow Cost? Credit Pricing and Budget Breakdown
Understanding AI video generator pricing before you start is the difference between a sustainable workflow and a blown budget by Tuesday.
Google Flow operates on a credit system. Free-tier accounts receive a limited credit allotment on signup — enough for a few test projects, not enough for a production pipeline. Paid plans scale based on monthly volume.
Here’s what real projects actually cost based on my testing:
| Project Type | Frames | Est. Credits | Est. Cost (Paid Tier) |
|---|---|---|---|
| 15-second social ad | 3–4 | 45–60 | ~$5–$10 |
| 30-second product spot | 5–6 | 75–90 | ~$8–$15 |
| 60-second narrative | 10–12 | 150–180 | ~$15–$30 |
| Character test (single) | 1 | 15 | ~$1.50–$3 |
The hidden cost most people miss: iteration. If you regenerate a clip because the lighting looks off or the character’s face drifted, that’s another 15 credits. Budget for 20–30% more credits than your frame count suggests.
Compared to Runway Gen-3 Alpha (which charges per second of generated video) or Sora (currently limited-access), Flow’s per-clip model is more predictable for short-form commercial work. For longer cinematic sequences, Runway’s per-second pricing can actually be cheaper.
Generating Cinematic Clips: The Full Commercial Walkthrough
Once your storyboard is locked, type “generate individual video clips for each frame” into the prompt box. Flow will show you a credit confirmation — 90 credits for six frames in my case — and ask you to approve.
Click approve. Wait a few minutes.
The first thing you’ll notice is visual consistency across frames. The bakery lighting, the color grading, the set design — all of it carries through from shot one to shot six. This is where Flow’s storyboard-first approach pays off. Because the AI understood the full narrative context before generating any single clip, the outputs feel like they belong in the same commercial rather than six unrelated videos.
You can click into any individual clip to preview it with audio. If a specific shot needs adjustment — maybe the camera angle is too wide or the lighting is too cool — select that clip and describe the change in the prompt box. Flow regenerates only that clip, not the entire sequence.
Pro tip: Do your clip-level refinements one at a time. Batch-editing multiple clips in a single prompt tends to produce muddier results.
Assembling Scenes on the Timeline: Editing Inside Flow
Generated clips are individual shots. To combine them into a watchable sequence, you need the scene editor.
Navigate to “Scenes” in the left sidebar. Right-click on the canvas and select “New Scene.” Click the plus icon at the bottom to start adding clips from your media library to the timeline.
The editor is basic but functional. You can:
- Rearrange clips by dragging them on the timeline
- Trim in and out points to tighten pacing
- Preview each clip in the right-hand panel before committing
- Apply per-clip AI edits by selecting a clip and describing changes in the prompt box
For my bakery commercial, I trimmed the opening shot to cut a slow pan, rearranged the oven sequence for better visual flow, and tightened the final product reveal to three seconds.
When you’re satisfied, click the download icon in the top right to export the finished scene. If you prefer finishing in professional software, go to “All Media” in the left nav, hover over any clip, click the three-dot menu, and download individual clips for import into DaVinci Resolve or Premiere Pro.
Character Locking: How the @Reference System Fixes AI Consistency
The single biggest problem in AI-generated video is character drift. Your protagonist looks like a 40-year-old man in scene one and a 25-year-old woman in scene three. Flow’s character system is the most effective solution I’ve tested.
Go to “Characters” in the left sidebar. You have three creation options:
- Text prompt — describe the character in detail (age, build, expression, clothing)
- Reference image upload — provide a photo for the AI to match
- Selfie-to-avatar — turn your own face into a Flow character (genuinely impressive, worth trying)
I created “Silas,” a master baker in his late 50s, using a text description. Flow generated his visual profile. I named him, assigned a voice from the built-in library, and clicked “Done.”
Here’s the magic part. In any subsequent prompt, type the @ symbol and select your character from the dropdown. I typed “@Silas eats a chocolate chip cookie at a busy train station” — a completely different environment from the bakery — and Flow generated a clip with the same face, same build, same visual identity.
This is what makes Flow viable for narrative content. Without character locking, AI video is limited to disconnected mood shots. With it, you can build actual stories.
If you’re trying to produce AI video ads for your business right now and you’re not sure whether Flow, Runway, or a traditional editor is the right move — ask yourself one question: do you need a finished 30-second spot this week, or a pixel-perfect cinematic sequence next month? If it’s the first, If it’s the second, keep reading.
Google Flow vs. Runway vs. Sora: Which AI Video Tool Should You Use?
The honest answer depends on what you’re actually producing. After testing all three on comparable commercial briefs, here’s where each tool wins:
| Criteria | Google Flow | Runway Gen-3 Alpha | Sora |
|---|---|---|---|
| Best for | Storyboard-driven ads, character narratives | Granular aesthetic control, single-shot beauty | Physics-accurate cinematic realism |
| Character consistency | ✅ Built-in @Reference system | ⚠️ Manual seed/image reference | ⚠️ Limited consistency tools |
| Workflow speed | Fast (storyboard → clips → scene) | Moderate (clip-by-clip iteration) | Slow (queue-based, limited access) |
| Pricing model | Per-clip credits | Per-second of video | Subscription (limited tiers) |
| Export flexibility | Individual clips or full scene | Individual clips | Individual clips |
| Lip-sync quality | Weak | Moderate | Strong |
| Learning curve | Low | Medium-High | Medium |
The bottom line: If you’re a small business owner or marketing coordinator who needs a 30-second product ad by Friday, Flow’s end-to-end pipeline is the fastest path. If you’re a filmmaker who needs precise control over every frame’s color grade and motion dynamics, Runway gives you more knobs to turn. Sora is the most visually stunning but remains the least accessible.
Transforming Existing Footage with AI Style Transfer
This is the feature that surprised me most. Flow doesn’t just generate video from scratch — it can transform footage you’ve already shot.
I uploaded a 10-second clip of myself walking through my backyard on a sunny afternoon. In the prompt box, I typed “transform this scene into a snowy winter day.” Within minutes, Flow returned the same composition, same camera movement, same walking motion — but with snow on the ground, overcast lighting, and visible breath vapor.
Practical use cases: seasonal A/B testing for ad creative, mood shifts for social media content, and rapid prototyping of visual concepts before committing to a real location shoot.
The limitation: style transfer works best on simple, single-subject scenes with minimal background complexity. Crowd shots and fast-moving action sequences tend to produce artifacts.
Frequently Asked Questions About Google Flow
Is Google Flow free to use?
Google Flow offers a free tier with a limited credit allotment that resets periodically. Free credits are sufficient for testing the workflow and generating a few short clips. For ongoing production, you’ll need a paid plan. Storyboard creation and text edits are always free — only video generation consumes credits.
How many credits does a video cost?
Each generated video clip costs approximately 15 credits. A typical six-frame commercial runs about 90 credits. Budget an additional 20–30% for iteration and re-generation when shots don’t come out right on the first pass.
Can I use Google Flow for commercial projects?
Yes. Paid-tier Google Flow outputs can be used in commercial projects, including paid advertisements and client deliverables. Free-tier usage may carry restrictions. Always verify the current licensing terms at flow.google before publishing.
Does Google Flow work on mobile?
Flow is optimized for desktop browsers. The workspace relies on a multi-panel layout (sidebar, canvas, AI assistant, timeline) that doesn’t translate well to mobile screens. Use a laptop or desktop for the best experience.
Your First AI Video: What to Do Right Now
Stop reading and open flow.google in a new tab. Sign in. Click “New Project.” Type a concept you actually care about — a product you sell, a story you want to tell, a scene you’ve been imagining.
Answer the three follow-up questions honestly. Spend ten minutes refining the storyboard. Don’t touch the generate button until every frame description reads like a real shot list.
Then approve the credits and watch what happens.
If you’ve made it this far, you already know more about AI video production workflow than 90% of creators who just hit “generate” and hope for the best.
Bookmark this page. Share it with someone on your team who’s been asking about AI video. And if you want to go deeper into the full AI production stack — from scripting to editing to distribution.
AUTHOR BIO: Solomon Nnamdi Eke-Osih, digital production specialist and AI workflow tester. Has generated over 200 AI video clips across Flow, Kling, and Sora for commercial and narrative projects.
